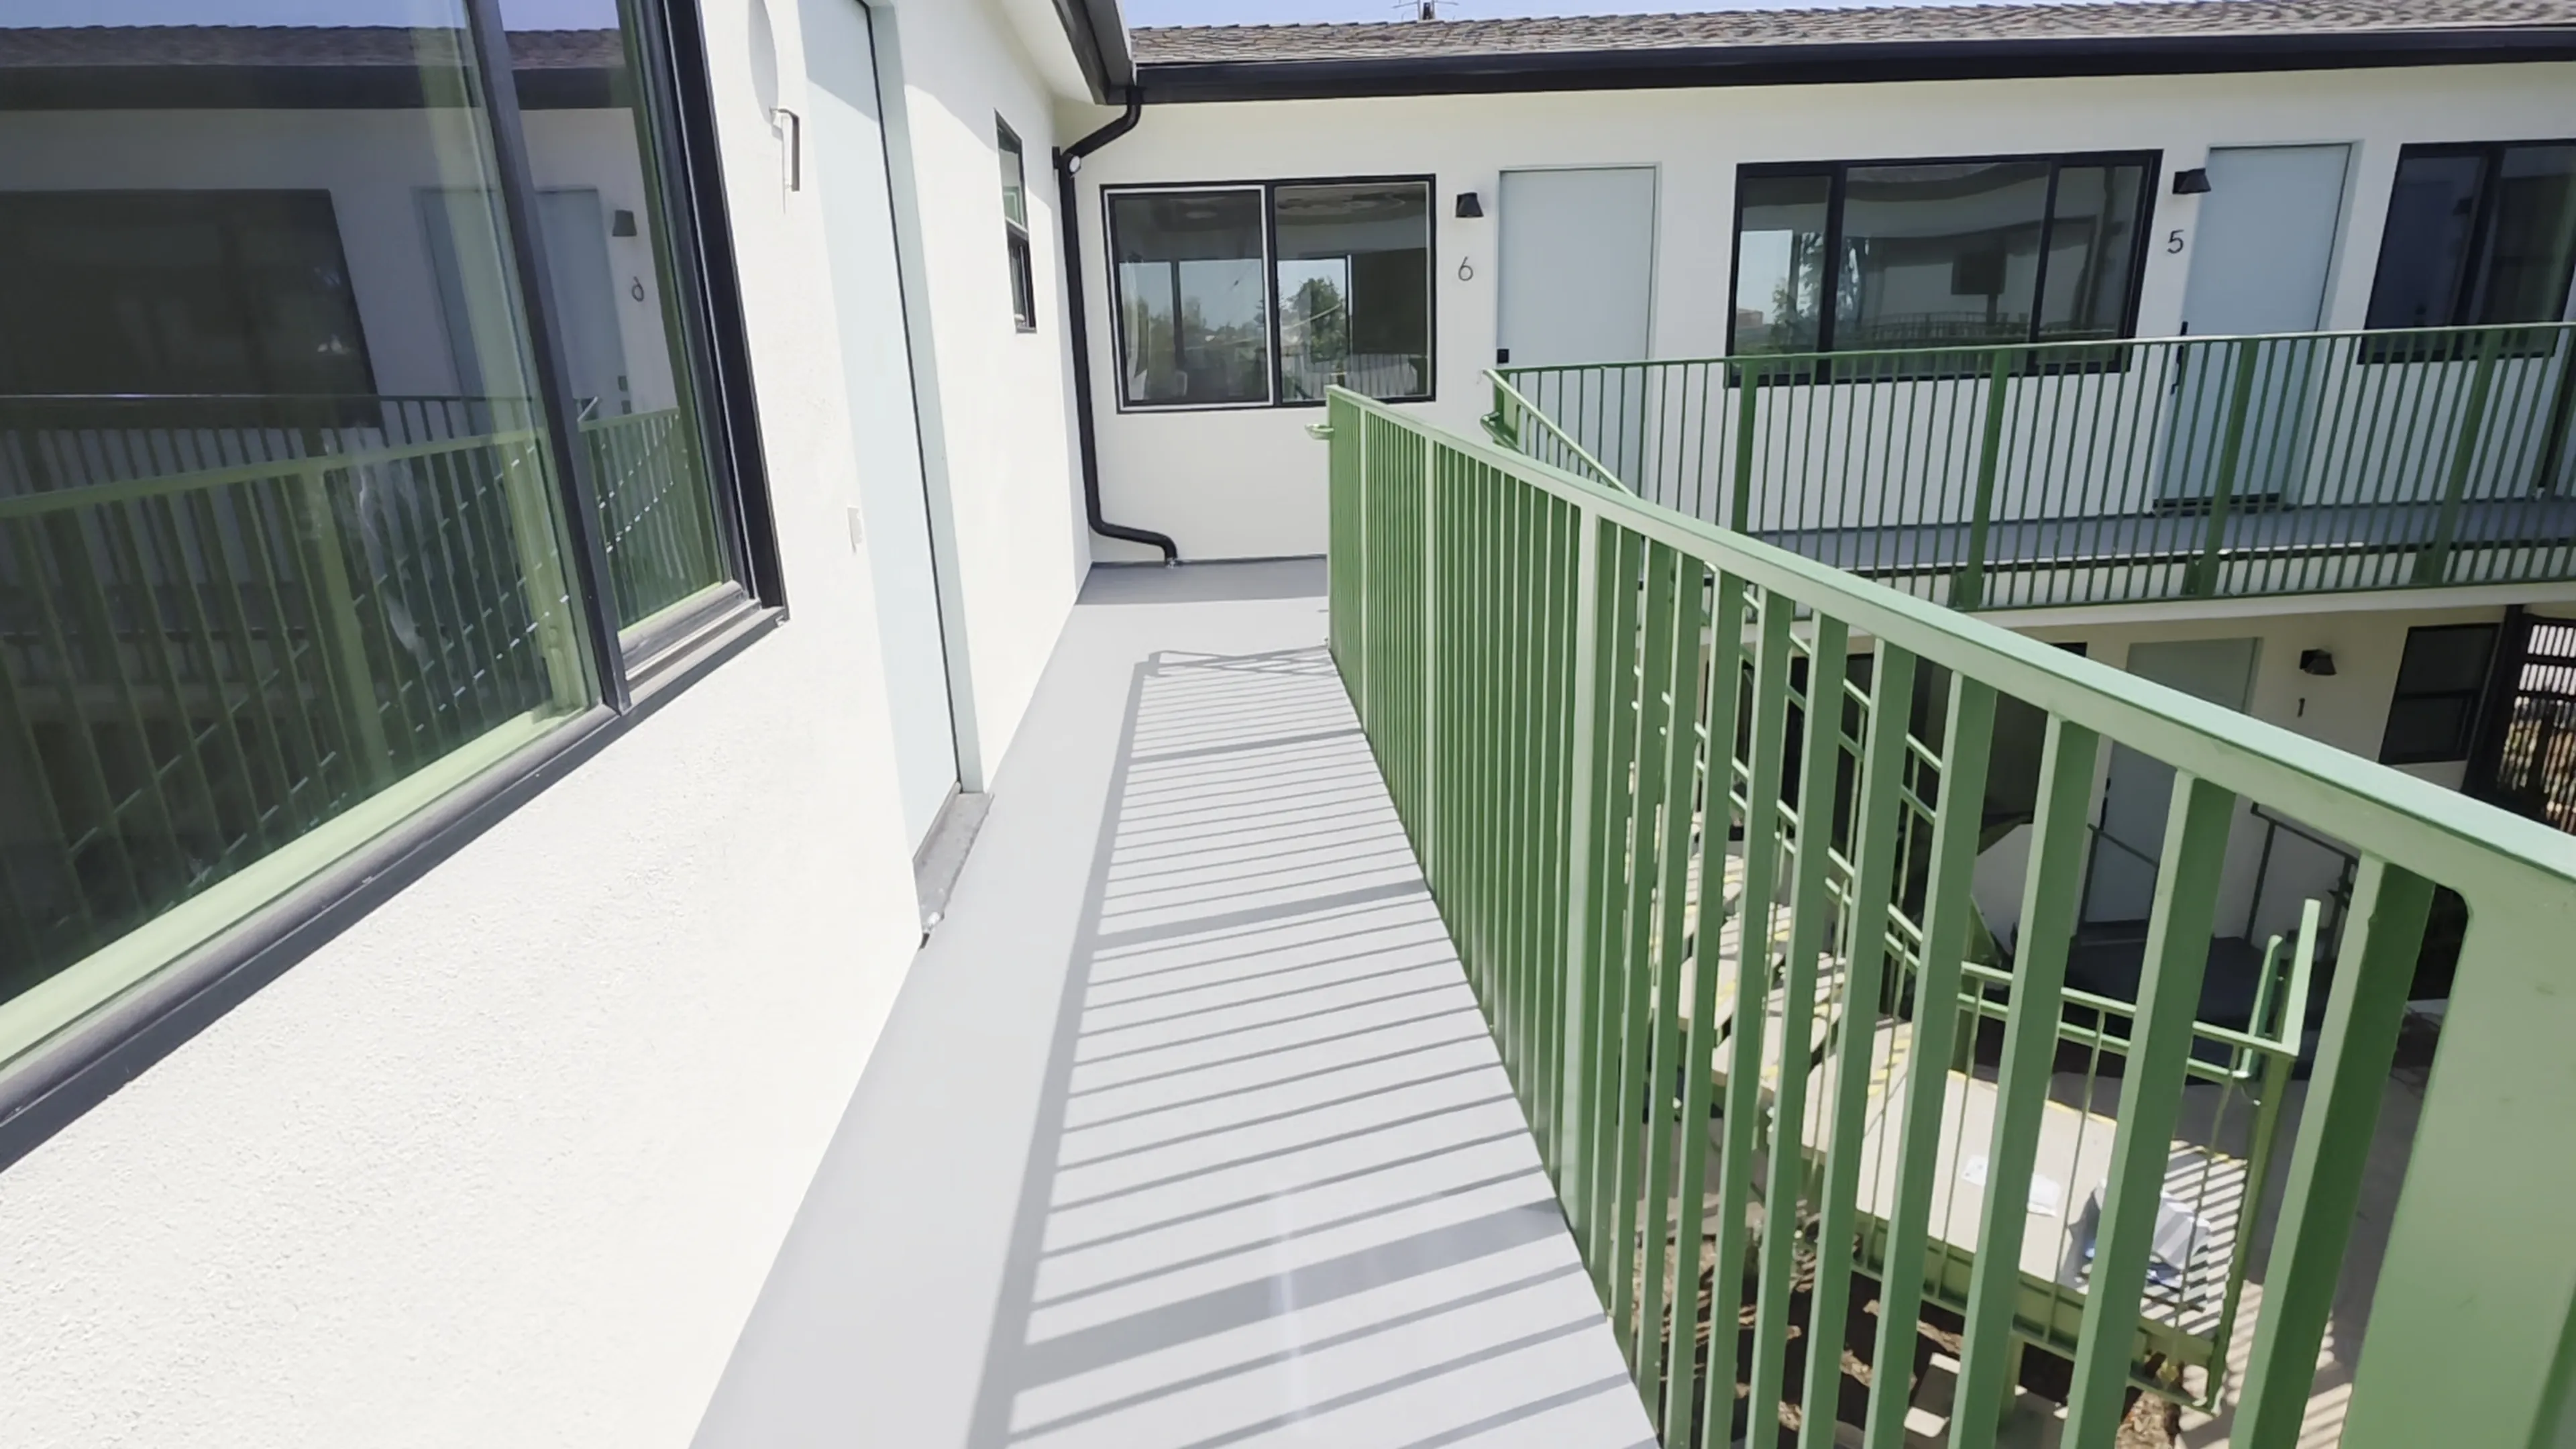
Shared Walkway Waterproofing for a Multi-Family Property
A documented Westcoat ALX Pro installation for a second-floor apartment walkway, wall transitions, Thunderbird deck drains, door thresholds, and four-step elevation changes.
The finished surface is only part of the work. This project documents the preparation, flashing, drainage and threshold detailing, membrane, reinforcement, cementitious build-up, and textured finish used to create a continuous pedestrian waterproofing assembly.
Thunderbird deck drains integrated with reinforced layers
Sloped door pan sills at apartment thresholds
Textured finish across walkway and step transitions
Documented Multi-Family Waterproofing Project
Pacific Palisades Shared Walkway Waterproofing
A detailed waterproofing installation across a shared second-floor apartment walkway, drainage and threshold details, and four-step elevation transitions.
This Pacific Palisades project began with a prepared wood walkway serving multiple second-floor apartments. The work required more than a finished walking surface: wall-to-walkway transitions were opened and detailed for flashing, waterproofing layers were installed in sequence, and the four-step elevation changes received the same continuous treatment as the main pedestrian path. Thunderbird deck drains and apartment door thresholds also received dedicated detailing. Each drain opening was measured so the drain could fit tightly while allowing room for metal lath and cementitious integration, and sloped door pan sills were installed to help direct water outward from the apartments. The result is a documented, textured walking surface built as a coordinated system rather than a surface-only coating.
Project Overview Details
Project location
Pacific Palisades, California
Property type
Multi-family apartment complex
Waterproofed area
Shared second-floor pedestrian walkway and four-step elevation transitions
System
Westcoat ALX Pro waterproofing system
Wall detail
Lower wall area opened to integrate flashing at the walkway transition
Drainage detail
Thunderbird deck drains integrated with measured openings, metal lath, and cementitious layers
Door threshold detail
Sloped door pan sills installed to direct water outward from apartment thresholds
Project documentation
Photo and video documentation from substrate preparation through final finish
Scope boundary
The shared ground-level patio was outside the waterproofing scope
A Coordinated Waterproofing Assembly
The project was built in layers, with each component serving a specific role in the finished pedestrian waterproofing system.
This is not a one-product coating job. The assembly combines preparation, flashing, drain and threshold detailing, membrane reinforcement, cementitious layers, texture, and color finish. The exact material selection, coverage, curing, and installation sequence should always follow the applicable manufacturer specification and verified project scope.
1
Bonderized Sheet Metal Flashing
Flashing and edge metal
Stage: Wall and edge transition detailing
Custom-fabricated flashing was integrated at designated wall-to-walkway and edge transitions before the finish layers were completed. These details help direct water away from vulnerable changes in plane.
2
Westcoat WP-40 Sheet Membrane
Sheet membrane
Stage: Seam and transition reinforcement
The sheet membrane was installed at specified seams and transition areas as part of the coordinated waterproofing assembly beneath the reinforced cementitious layers.
3
Polyurethane Sealant
Joint sealant
Stage: Transition and joint treatment
Sealant was used at applicable joints and transitions to address gaps and changes in plane before subsequent system layers were installed.
4
Thunderbird Deck Drains
Drainage component
Stage: Drainage integration within reinforced assembly
Thunderbird deck drains were fitted at designated drainage openings. Each opening was measured and detailed to preserve a tight drain fit while allowing adequate room for the surrounding metal lath and cementitious integration.
5
Sloped Door Pan Sills
Door-threshold flashing
Stage: Door threshold and drainage detailing
Door pan sills were installed at apartment thresholds with a slight outward inclination to help route water away from the interior side of the doorway and toward the exterior walking surface.
6
Galvanized Expanded Metal Lath
Reinforcement
Stage: Reinforced cementitious assembly
Metal lath provided the reinforcing base for the cementitious layers, helping create a continuous walking surface across the main walkway, drainage openings, door thresholds, and step transitions.
7
Mechanical Fasteners
Attachment
Stage: Membrane and lath attachment
Specified fasteners secured reinforcing materials to the prepared substrate. Fastener type, spacing, and placement should follow the applicable system requirements.
8
Westcoat TC-1 Basecoat Cement
Cementitious base material
Stage: Reinforced base layers
TC-1 was used with the specified liquid components to embed the lath and build the reinforced cementitious portion of the waterproof walking surface.
9
Westcoat WP-81 Cement Modifier
Cement modifier
Stage: Cementitious layer admixture
The cement modifier was used with applicable cementitious materials according to the selected Westcoat system configuration.
10
Westcoat WP-90 Waterproofing Resin
Waterproofing resin
Stage: Cementitious system component
WP-90 was used as part of the documented ALX Pro cementitious assembly. Product use, mix ratios, coverage, and curing should follow the applicable Westcoat specification.
11
Westcoat Texture Cement
Texture coat
Stage: Walking-surface texture
The texture layer established the finished surface profile before final color coating, supporting a more practical exterior walking surface for shared pedestrian use.
12
Westcoat SC-10 Colored Topcoat
Acrylic topcoat
Stage: Final protective and decorative finish
SC-10 provided the final colored finish over the completed assembly, giving the walkway its uniform finished appearance.
Project Installation Sequence
How the Walkway Was Built, Layer by Layer
The project documentation shows the work that disappears beneath the final surface: substrate readiness, wall flashing, membrane continuity, drain and threshold detailing, reinforcement, cementitious layers, and the completed textured finish.
01
01Substrate Readiness
Substrate Readiness
Prepare the Shared Walkway
The walkway was cleaned and prepared so the waterproofing assembly could begin on a flat, sound, and properly reviewed surface. The focus was not simply getting to the next layer; it was establishing a consistent base across a shared exterior pedestrian route.
Site conditionA waterproofing system depends on the condition of the surface below it. Debris, uneven areas, poor attachment, and unresolved substrate issues can affect every layer that follows.
Prepared wood walkway substrateApproved fastening and repair materials as needed
01 / 05
02
02Flashing Integration
Flashing Integration
Open and Detail the Wall Transition
The lower wall area was opened approximately 10 inches above the walkway surface to create access for flashing integration. This detail is central to the project story: the waterproofing system was carried into the wall transition rather than ending at a visible surface edge.
Site conditionWall-to-walkway transitions are a critical water-management detail. A surface coating alone does not provide the same level of integration as flashing installed behind the finished surface.
Bonderized sheet metal flashingPolyurethane sealantSpecified transition materials
02 / 05
03
03Membrane and Transition Detailing
Membrane and Transition Detailing
Create Continuity Across Seams and Steps
Membrane and transition details were installed across the walkway surface and continued through the four-step elevation changes. The goal was a continuous waterproofing assembly, not isolated treatment of the flat walkway while leaving steps and connections as afterthoughts.
Site conditionA shared elevated walkway includes seams, edges, and elevation changes where water can find vulnerable paths if the assembly is not carried continuously through each transition.
Westcoat WP-40 Sheet MembraneTransition reinforcementSpecified sealant and edge details
03 / 05
04
04Lath, Drain, Threshold, and Cementitious Build-Up
Lath, Drain, Threshold, and Cementitious Build-Up
Reinforce and Build the Walking Surface
Galvanized metal lath was installed over the prepared assembly to reinforce the cementitious layers, including precise detailing around each Thunderbird deck-drain opening. The drain openings were measured to retain a tight final drain fit while preserving enough surrounding space for lath and cementitious integration. Door pan sills were also detailed at apartment thresholds with a slight outward inclination, helping direct water away from the interior as the reinforced walking surface was built around them. Cementitious material was then applied to embed the lath and build the continuous walking surface across the main route and each elevation transition.
Site conditionDrain openings and door thresholds are high-consequence details within an exterior walking surface. Each Thunderbird drain opening had to be measured precisely so the drain could fit tightly after metal lath and cementitious material were integrated, while door pan sills needed to maintain an outward path for water at apartment thresholds.
Galvanized expanded metal lathMechanical fastenersThunderbird deck drainsSloped door pan sillsWestcoat TC-1 Basecoat CementWestcoat WP-81 Cement ModifierWestcoat WP-90 Waterproofing Resin
04 / 05
05
05Texture and Color Finish
Texture and Color Finish
Finish the Complete Pedestrian Route
The completed assembly received its textured color finish across the shared walkway and the four-step transitions. Final images show not only the finished waterproofing surface, but the restored exterior setting: painted guardrails, walls, doors, windows, deck drains, and a completed multi-family pedestrian route.
Site conditionThe final walking surface must work as part of an exterior residential circulation area, where routine foot traffic, sun exposure, moisture, drainage, and visible appearance all matter.
Westcoat texture cementWestcoat SC-10 Colored TopcoatSpecified texture and finish materials
05 / 05
Project Questions
Questions This Project Answers
The documented installation helps property owners, managers, architects, and general contractors understand why a walkway waterproofing scope must address more than the visible top surface.
Why did the wall need to be opened before walkway waterproofing was installed?
The wall-to-walkway connection is a critical transition. Opening the lower wall area created access to install and integrate flashing behind the surface layers rather than relying only on a visible coating at the edge.
Why are Thunderbird deck-drain openings detailed during lath and cementitious installation?
Each drain needed to fit tightly within its opening after the surrounding lath and cementitious materials were installed. The opening was measured and maintained so reinforcement and cementitious build-up could integrate around the drain without interfering with its final fit.
Why was a sloped door pan sill installed at each apartment threshold?
The door pan sill was set with a slight outward inclination to help route water away from the apartment interior. It was integrated with the surrounding lath and cementitious layers so the threshold remained part of the continuous exterior waterproofing assembly.
Why are the four-step elevation changes treated as part of the waterproofing system?
Steps create multiple changes in plane, edges, and pedestrian-impact areas. Treating each tread, riser, and transition as part of the same assembly helps maintain continuity from the main walkway through the elevation change.
Why use a textured finish on a shared apartment walkway?
A textured finish helps create a more practical walking surface for exterior pedestrian areas. The final texture, use conditions, drainage, and maintenance requirements should be considered together for each property.
Can SPL Waterproofing evaluate a similar apartment walkway project?
Yes. SPL Waterproofing can review visible conditions, project plans, transition details, drainage paths, substrate needs, and the intended use of the pedestrian area before discussing an appropriate scope.
Talk Through Your Project
Planning a Walkway, Stair, Deck, or Balcony Waterproofing Project?
Share photos, plans, or site conditions with SPL Waterproofing. The team can discuss visible conditions, transition details, drainage paths, waterproofing scope, and practical next steps for your property.